Showing posts with label beads. Show all posts

Thursday, January 21, 2016

The Great Cover Up

Every January finds me wanting to clean up and reorganize closets and drawers. Well earlier this month, while doing just that, I found a sack full of old beads....I'm talking A LOT of beads! Ugly beads I made years ago when I first started learning and experimenting with polymer clay. (Admit it, every beginner has them.) Well, I questioned what I would ever do with them all. I certainly didn't like them any more (and I'm pretty sure no one else would) and I couldn't just throw them away! Then I remembered......some famous artists, like Picasso and Van Gogh, painted over, or covered up, some of their original paintings. Whether they felt their first attempts were failures or they just didn't have the money to buy more canvas, they persevered and kept painting. So with that thought in mind, I took out a couple dozen beads from that sack, feeling pretty certain I could do better this time around.
This was a pretty messy job and a lot harder than I thought it would be.

I wanted to change the shape of the beads and was hoping to be able to cut them clean in halve but that didn't happen. Polymer clay is tougher than I thought! I don't know if it was me, the knife, or the brand of clay. Some cut fairly easy while others chipped and crumbled. But none of them gave me two perfect halves.

Once I had several halves I experimented with covering them in different ways. Some I covered with slices of a skinner blend bullseye cane and I added texture using rough sandpaper. For some, I covered them with a thin layer of solid blue clay and then imprinted lines around them. And for others I used some dry, chopped up clay much the same way I used to make some ring dishes last year. (You can find those instructions here).
They remind me of something you might find washed up on shore somewhere!


After they were cured (and a little white paint added to the blues) I was pretty happy with the results so I decided to make a few more, using some more of my "ugly" beads in various other shapes. 


So much better, don't you think? I really love the organic look. I'm so glad I decided to keep on trying! I'll be listing these soon in my Etsy shop. I don't have time to make them into jewelry. I have more beads to cover up!

Tuesday, May 13, 2014

Another Bead Tutorial

Last week I wrote about making beads from some of my old, hard clay.  I mentioned the same technique could probably be done using old canes.  I hadn't tried it but figured it could be done the same way. So.......I decided to give it a try. It just so happens that I have been holding onto some ugly, brittle canes. Just when you think something is unusable....think again!

I started off the same as before, chopping up my cane with my clay blade until I had a pile of small pieces.

Since this clay was really, really dry I drizzled some liquid clay over it and mixed it all up. This is the point where things took a turn.

I was planning on painting my pieces, like previous, but I just wasn't sure it would work with this now sticky pile of clay. So.....I picked up a small amount and smooshed it together. I rolled it into a fat log and started twisting. This made the colors spiral. I flattened it out and ran it through the pasta machine. This gave me a nicely lined sheet of clay. Next, I folded the sheet in half and ran it through the pasta machine again. This started blending the lines into each other. I kept repeating this procedure until I liked the look of it.
Then....what do I do next? Hmmmm..... I remembered I had made some beads once before by wrapping a veneer around a core of scrap clay so I decided to do that! I rolled a ball of clay to use as the center of the bead, cut a strip of the lined sheet just slightly wider and wrapped it around, cutting it where the ends met up. 

Now, here's what you end up with.


Just gently pinch the ends together and slowly work the clay closed.


Then roll the bead in your hands to finish joining it all together.


The next thing I did was to add some texturing to the beads. Why? Because I absolutely hate sanding. I love the look and feel of a perfectly sanded and polished piece of polymer clay but I dread the work it takes! I especially hate sanding and polishing small round beads! Do you know how many times they get dropped???? So, I took the lazy way and added some texture to these beads by rolling them in salt and this is what I got. The only thing left to do was to pierce a hole through it. One down, several more to go.


Here's what I ended up with. Twenty rustic looking beads, all with their own unique colors. I think they look like old, distressed beads that have just been dug up at an archaeological site. (I always wanted to be an archaeologist when I was little.) Or maybe tiny planets, complete with craters! (I never wanted to be an astronaut.)


So there you have it. Yet another way to use up old dry clay!


Tuesday, August 27, 2013

Bead Do Over

I have been experimenting, learning and playing around with polymer clay, off and on, for close to 19 years.  And in all of that time I have made my share of mistakes. If you have ever tried a new craft I am sure you know what I mean. Sometimes I look back on what I made years ago and think "Oh, my! What was I thinking?"

I have held onto quite a few of these mistakes, not wanting to throw them out but not really knowing what I'm ever going to do with them. Take these beads for example.


They were supposed to look like white marble. But that is not what I got! So, what should I do with them?

Well, since I've been working with polymer for so long I have also made lots of canes, many of which I still have pieces of.  Like these that I made about 3 years ago.


So, I decided to cover my ugly beads with some slices from my leftover canes. Killing two birds with one stone, getting rid of my ugly beads and my leftover canes! It's a win, win!

So that's what I did and here are the results!


What an improvement! I really like their fun new shape! Perhaps I'll make a few more of these and list them in my shop. And I have plenty of other beads that could use a makeover. Oh, the possibilities.......

Sunday, February 10, 2013

Jewelry for Your Hair

Yep, I'm at it again. Exploring something new, playing around with an idea. Seems I have craft ADD. Jumping from one thing to another, sometimes never looking back.

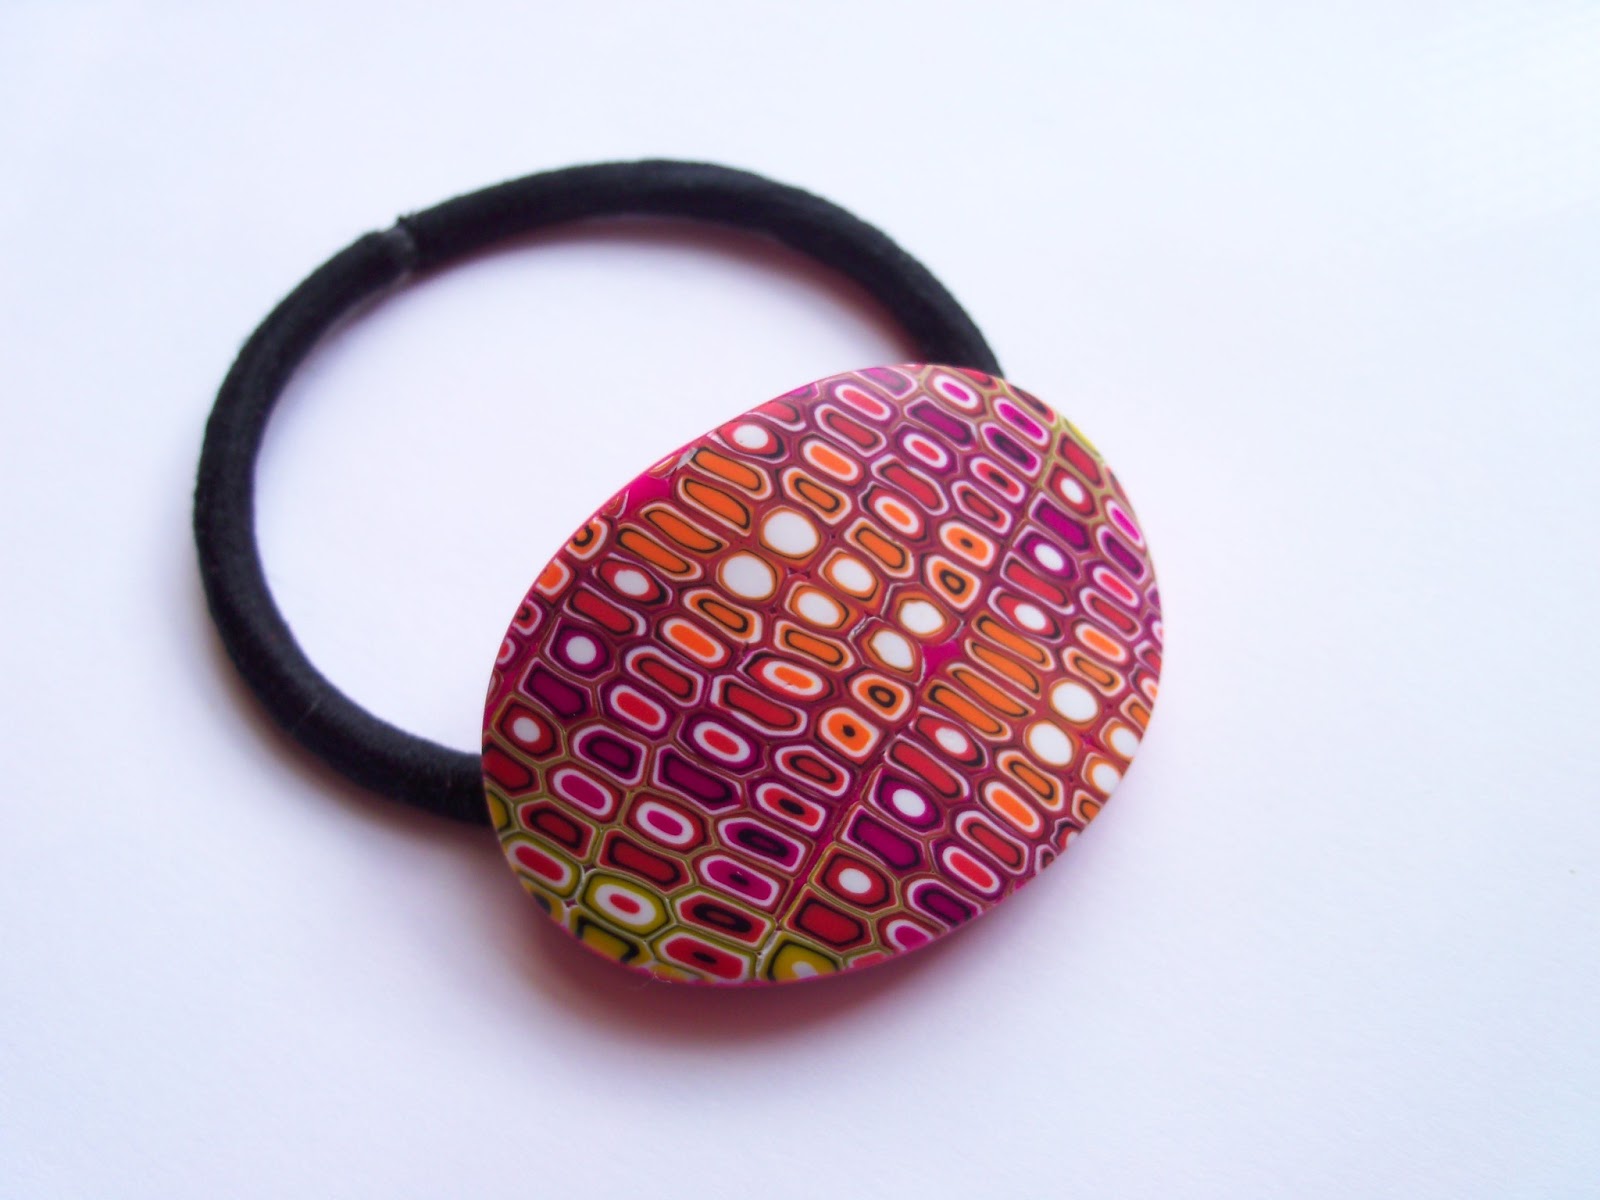
So what am I doing now? Beaded ponytail holders!  I don't even know where this idea came from or why I'm all of a sudden possessed with this thought. But once an idea is in my head I just have to go along with it. So here is what I've made so far.
This was the first one, made with some of my older beads I found in my stash!

More old beads I've had around for some time! I finally found a use for them.

I just made these beads especially for this project.

I think I will keep this one for myself!

This is a prototype. Think I will wear it as a trial since it's the first one.

I hope to have some of these listed before warm weather gets here. Summer is the perfect time to wear a ponytail. So why not pull your hair up with a stylish, one of a kind ponytail holder! They aren't just for little girls.

Thursday, September 20, 2012

Spice Things Up!

Today I want to share with you my latest experiment.  Now this is in no way something new that I have come up with, I read about this quite some time ago. But I finally got around to trying it for myself. I'm talking about adding inclusions in polymer clay.  And the inclusions I chose were straight out of my spice cabinet.


All you need is some translucent polymer clay and some spices! Mix your spices into the clay, shape it, bake it and you're done!

Here is what mine turned out like. I love the earthy colors!  Oh, and they smell good too.


From left to right, ground cloves, pumpkin pie spice, ground allspice, ground ginger, ground turmeric, paprika, dill weed and ground sage.

And that dark brown one on the left, that one has coffee grounds mixed in.  That one is my favorite I think.


I haven't decided if I will make something with these or just list them as is.  They would make a great necklace for a chef or anyone who loves to cook, don't you think?

Well, that's all for now. I think I will go make some more. See ya next time...... 

Wednesday, August 8, 2012

And the Winner Is.....

Two months ago, at the beginning of summer, I was feeling a bit uninspired. I was wanting to create but all I could do was sit at my table and stare at my clay.  No ideas, no direction. So I issued a challenge.  I was hoping someone would kick start me into doing something that I otherwise may not have thought of. And I am happy to say, that's exactly what happened!  I received 6 suggestions. Just enough to not be too overwhelming yet just what I needed.  I offered those who gave me an idea the chance to win what I had made per their challenge.  So, as a reminder, here are the 6 projects.

marble beads suggested by Katharine
African themed beads suggested by Jeanne


Frogs suggested by Karalee

Dolphins suggested by Lulu Divine
Snake beads suggested by Sarah


Watermelon beads suggested by Kimberly


Well, I put all of the names in a hat and had my daughter pick a winner.      


And the winner is.........Sarah!  Congratulations!!!!!!
I want to thank everyone who took the time to help me out of my creative slump.  This really did get me to thinking.  If you ever feel like you are running into a brick wall, just turn to your friends.  They will help point you in another direction.


Saturday, August 4, 2012

No. 6 - Who Wants Some Watermelon?

I can't believe summer will soon be over.  School starts back in two weeks!  And it's already been almost two months since I announced my bead challenge.  Where has the time gone? Summer has flown past me. Isn't it funny how some days drag on and you wish time would speed up? Like when you're stuck  in traffic or there's a long line at the store? Or when you have an upcoming vacation and you just can't wait to leave.  Then there are days that speed by.  Like when you finally go on that much anticipated vacation and it seems you just got there when you find yourself packing to go back home.

Well speaking of summertime and my bead challenge and home brings me to today's blog post.  The last bead challenge I got was from Kimberly at Madeforjake. She wanted to see what I could make with "watermelons" as my theme.  Now, I just love watermelon.  I mean, who doesn't?  Just the thought of a big sweet juicy slice of watermelon takes me back to my childhood.

I remember my Daddy bringing home a fresh from the field watermelon and leaving it setting on the porch until Sunday.  Then, before leaving for church, he would put it in the freezer to get it good and cold.  Later in the afternoon Mama would gather up some old newspapers, a knife and the salt shaker and we would all head outside to the back porch.  It was Daddy who would cut open the watermelon and hand us out each a big wedge.  Yum!  It's hard to say what's sweeter, the melon or those great memories:  the sticky juice dripping from my chin and running down my arms, spitting the seeds in the yard and when we were full, throwing the rinds out into the woods for the raccoons or possums to finish.  Good ol' country livin'. Memories that me and my sisters now share.

Now making watermelon beads is brand new to me but thankfully there are lots of tutorials on the web.  So I started out making a fairly simple round watermelon cane.  But then, I got stuck. Where do I go from here?  I sliced the cane and made a few flat beads but I wanted more.  I wanted something a little different. So, after thinking about it (more like putting it off) I finally came up with an idea. A way to turn these flat slices into a round (sort of) bead that I haven't seen before.  I am happy with the way they turned out.  So what do you think? Do these beads make your mouth water for that sweet summertime fruit?  They do for me.  And it just so happens I have some in the refrigerator.  So I think I will go have me a slice while I think back to those sweet, simple days when I was a child.


Monday, July 23, 2012

No. 5 - Snake in the Grass

I've heard it said that the best way to get over a fear is to face that fear head on.  I don't think I'm so afraid of something that I am immobilized by it.  Take snakes for instance. I'm not terrified of them, but they aren't my favorite creatures.  I just don't care to be near them.  The thought of them slithering around makes me shudder.  So when Sarah from Star Jewels challenged me to make a set of beads that when strung together looked like a snake, well let's just say I was not overjoyed.  I thought, aaagh, really? A snake? But I faced this challenge head on.  I took a deep breath and told myself, okay, I can do this!  And once I made up my mind I dove right in. Patience is NOT my strongest virtue!

So here they are. The beads that I made to resemble a snake.  Now, did they turn out exactly like I had envisioned? No.  Are they perfect? Hardly. But was this challenge a failure? Not at all!!  I learned what works and what doesn't.  So now I know to take a different approach next time.  Did I say next time? Yeah, I think I'll make more similar to these.  I have to admit, even a cold blooded snake can inspire me. I mean, have you ever really noticed the beautiful patterns and colors of some.  So maybe it's true what they say, face you fears head on!  Something beautiful may emerge from the experience.


I would like to encourage you to take on a challenge. You just might surprise yourself with the outcome. And don't let the thought of failure scare you.  Just dive right in!  I would love to hear your thoughts or comments.


Saturday, July 14, 2012

No. 4

It's been 5 weeks now and bead challenge number 4 is done!

Lulu, from Divine Lulu Creations, wanted to see what I could come up with using dolphins as my theme! This is what she said, and I quote, "How about dolphins? It's almost summer and they're so happy and beautiful!"

Well Lulu, how did I do?  Looking at this little guy makes me happy!  But you know what they say about beauty, it's in the eye of the beholder.  It's hard to capture the true colors and depth of these beads in pictures. They look much better in person, all glittery and shiny!


I'm picturing these made into a ceiling fan pull.  How cute would that be in a little girls bedroom?  Add a few sparkly crystals.... hmmm. Maybe.  I won't do anything else with these for now because I have to focus on my next project.  Snake beads.  I'm really going to have to switch gears for that. Wish me luck!


Friday, July 6, 2012

No. 3

Here's an update on how things are going with my bead challenge. It's been a couple of weeks but I am happy to say, challenge #3 is done!!!

Karalee from iFrogCrafts suggested  "frogs".  No problem. I happen to like frogs. And toads.  Now, I know some people don't.  I have a neighbor who avoids them at any cost.  But not me.  It's not unusual to see me outside trying to catch them with my kids.  Especially the green tree frogs that stick to my windows, attracted to the bugs flying around the lights.

Now I have a little experience in making frogs out of polymer clay.  You see, my brother-in-law likes tree frogs.  A few years ago he asked me to make a necklace for him to give to my Mom.  Well, I did. It had about 5 little colorful frogs on it, I think.  She wore that necklace one day to a chiropractor appointment and the doctor bought it right off of her neck!  Which reminds me, I owe her a new necklace because she gave me the money!  And something else I did involving frogs was a vase.  Here's the link to take you to that picture. http://www.flickr.com/photos/flowertownoriginals/5832573870/in/photostream  This vase now sits in said brother-in-law's home.

So, back to my new frog project.  I decided to make just one frog and I wanted to make it as realistic as I could.   It turned out bigger than the ones I made for my Mom, but I think it turned out better.  I guess the old saying is true, practice makes perfect.  Not that my frog is perfect, far from it,but it is pretty darn cute!  So what do you think? I know, this is a bead challenge and this isn't exactly a bead.  But he can be hung on a necklace and I did make coordinating beads to go with it.  So I think this qualifies. Right?


This baby tree frog, along with 100s more, emerged from my defunct backyard pool.
And yes, that is me holding him!


My next challenge is dolphins.  I have no idea where this may lead.  So be on the look out.  I'm sure it will be fun.  Hmmm.......dolphins......


Sunday, June 17, 2012

Out of Africa?

If you have read my last couple of posts then you know that I am doing what I am calling a bead challenge.  I posted that I wanted some suggestions for making beads. I was feeling uninspired and needed someone to kick my butt in gear.  Well, I had 6 people respond to my challenge and today is show and tell day # 2.

Jeanne from Blue Ridge Origami, suggested  I make African themed beads.  She mentioned that someone she works with, who is from Zambia, had brought some handmade African jewelry to the states with her.   Well for me, the first thought in my head when I hear Africa is animals; you know, lions, elephants, zebras and giraffes.  I could have gone the animal print route but that really wasn't were I wanted to go.  I wanted my beads to have a more natural Earthy feel. Maybe even a little primitive looking.  Something that had been made of bone or clay or had been painted with natural dyes.  So, where did that lead me?  To google of course!

When I was a kid I used to have to turn to the World Book Encyclopedia for the answers to my questions.  I had a teacher that when asked something by a student, her answer was "Look it up!"  Today, I don't even think my kids know how to look up information in an actual book!  The response I give them when they ask a question is "Google it!" Boy how things have changed in the past 3 decades! Is the World Book even published anymore? Hmmmmm

But now, back to the beads. I chose to use black, brown, gray, ivory and brick red, which is a far cry from my normal color palette. Sometimes we need a change from the norm.  And I have to say, I enjoyed it! In fact I got a little carried away.  I ended up making 51 beads which when strung together measures 22 inches.  Lots of possibilities with that many beads, I think.  I am very pleased with the way they turned out.  What do you think? Did I capture the African theme?  Thanks Jeanne, you have opened up my mind to even more projects in the future.

Well, I have now completed 2 challenges and I am looking forward to the next one.  I already have a plan for it, so be on the look out!  Karalee, you're up next!
They are temporarily strung just to give you an idea of how they could look as a necklace

Friday, June 15, 2012

Playing with Marbles

It's been 4 days since I posted about the challenge I was undertaking and I have had 6 responses.  Today I am happy to say I have completed my first challenge!

A fellow Etsy team member and shop owner, Katharine challenged me to make a set of "cat's eye" marble beads.  She said her Mom had been a marble player and  she remembered the way the cat's eye marbles had a "glowy" look about them.  I spent 2 days trying to replicate that in polymer clay.  Sorry to say, I was not happy with my results.  But I decided not to totally give up on the idea of marble beads.

You see, I too have childhood memories, not of my Mom's but of my Dad's marble collection.  He had a box full of marbles that he had once played with as a young boy.  I remember running my hands through these small  glass spheres and being in awe of their colors and patterns.  Some of them were solid white, while others had swirls of two or three colors.  I used to like to hold the transparent ones up to my eye and look through them at the light.  Daddy told us how he would carry them to school and play with his friends at recess, drawing the circle in the dirt.  So it was with these fond memories that I worked on my beads.

I did look at vintage marble images on google to get ideas on authentic colors.  Because of course I wanted the brightest most colorful marble beads I could make without straying too far from the real thing.  So here they are.  They may not be transparent like cat's eye marbles and they certainly are not perfectly round.  But I think, from a slight distance, they look like marbles. And I think my Dad would agree.

My polymer clay marble beads

So thank you Katharine for your suggestion that I make marble beads.  Being that it is almost Father's Day, I couldn't think of a better way to remember my Dad, as a young boy playing marbles in the dirt!

Some of my Dad's original marbles


It's not too late to give me your ideas.  Leave me a comment here or on my Facebook page.  I would love to hear from you.                                              

Embossing Folders and Polymer Clay Buttons

I have been so busy with some big (well, big for me anyway) custom orders the past few weeks that I haven't had time to play. But all of...